


Canon Pixma Pro 9000 Support Page
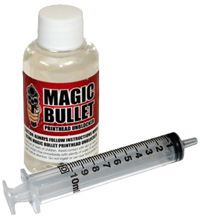
Video Description This video demonstrates how to unblock a blocked printer head. A blocked printer head is when Ink dries on a print head. Do not run multiple cleans as this in fact makes it worse, as even more ink dries out and wastes ink! Magic Bullet breaks ink particles down. Purchase Magic Bullet Printhead Cleaner below: 20% off RRP |
Video Description A printer can sometimes become blocked under the head. Directions as shown in video - Purchase Magic Bullet Printhead Cleaner below: 20% off RRP |
Video Description How to Drill out Epson Inkjet Spigots with Micro Drill Often the simple reason that you lose a complete colour channel on your inkjet printer is because the inkjet spigot that pierces the ink cartridge is blocked. Simply drill out the affected spigot with the correct size Micro Drill - purchase below... Purchase Inkjet Spigot Micro Drill below: |
 |
Printer purge files are areas of a solid color (or a selection of colors) that can get clear a blocked printer without having to resort to printer cleaning cycles. For more severe blockages (where your nozzle check is missing in the same places each time), we recommend you carry out a combination of printing purge files (individual or complete depending on the color(s) that are missing) with cleaning the printer using the Magic Bullet cleaning fluid explained below. This combination means you are softening the ink that has dried inside your printer using the Magic Bullet fluid and then pushing the ink through using the purge file.
Please find below the complete Purge file for this printer as well as the individual purge files that you can download for printing.
COMPLETE 8 CHANNEL CANON PURGE FILETo Save and Print this Purge File: PC Users: Right click the purge file and select "SAVE IMAGE / PICTURE AS" 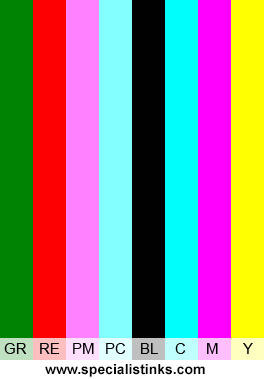 |
Hex and RGB Values for these 8 colors Green, Hex Value: #008000 (R:0 G:128 B:0) Red, Hex Value: ff0000 (R:255 G:0 B:0) Photo Magenta, Hex Value: ff80ff (R:255 G:128 B:255) Photo Cyan, Hex Value: 80ffff (R:128 G:255 B:255) Black, Hex Value: 000000 (R:0 G:0 B:0) Cyan, Hex Value: 00ffff (R:0 G:255 B:255) Magenta, Hex Value: ff00ff (R:255 G:0 B:255) Yellow, Hex Value: ffff00 (R:255 G:255 B:198) |
If you are having difficulties with only a small number of channels (or even just one), here are the individual color purge files:
| Green | Red | Photo Magenta | Photo Cyan | Black | Cyan | Magenta | Yellow |
GREEN PURGE FILETo Save and Print this Purge File: PC Users: Right click the purge file and select "SAVE IMAGE / PICTURE AS"  |
RED PURGE FILETo Save and Print this Purge File: PC Users: Right click the purge file and select "SAVE IMAGE / PICTURE AS"  |
PHOTO MAGENTA PURGE FILETo Save and Print this Purge File: PC Users: Right click the purge file and select "SAVE IMAGE / PICTURE AS"  |
PHOTO CYAN PURGE FILETo Save and Print this Purge File: PC Users: Right click the purge file and select "SAVE IMAGE / PICTURE AS"  |
BLACK PURGE FILETo Save and Print this Purge File: PC Users: Right click the purge file and select "SAVE IMAGE / PICTURE AS"  |
CYAN PURGE FILETo Save and Print this Purge File: PC Users: Right click the purge file and select "SAVE IMAGE / PICTURE AS"  |
MAGENTA PURGE FILETo Save and Print this Purge File: PC Users: Right click the purge file and select "SAVE IMAGE / PICTURE AS"  |
YELLOW PURGE FILETo Save and Print this Purge File: PC Users: Right click the purge file and select "SAVE IMAGE / PICTURE AS" 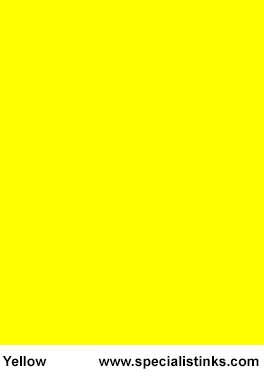 |